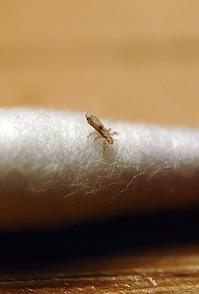
It caught me by surprise. My 13-year-old son, newly arrived from a soccer match, said that his head felt itchy and went off to take a bath. A few minutes later he called out, "Mom, look what I found," and emerged from the bathroom with his finger tip extended, a spindly brown thing with many legs perched on the end. This event was unexpected -- there had been no reports from school -- but I stayed calm. We'd been through the head lice wars before, and I knew what to expect. The first time around, we'd treated the condition with one of the over-the-counter remedies that contains permethrin, a synthetic insecticide. But the chemicals don't always kill all the nits, and my son (are all teenagers this stubborn?) remembered that he didn't like the smell and refused to use the lice-killing shampoo. Unwilling to argue about it, I decided to skip the chemical process and go straight to the nitpicking. It took time and effort, but nitpicking alone worked. For those of you who face a similar infestation, here's a guide to getting rid of head lice the natural way:
- Diagnose the condition. The main symptoms are itchiness on the scalp and back of the neck. You may spot a few gray or reddish brown live head lice, but mostly you will see nits, or unhatched eggs. The eggs are oval-shaped and about the size of a sesame seed or smaller, and they will be firmly attached to the side of the hair shaft.
- Don't panic. Head lice are no fun, but you can quickly gain the upper hand if you are diligent about it. (During our recent bout, the rest of the family was unaffected.)
- You will need patience and a good pair of magnifying glasses. Lice are canny critters and do a great job hiding their eggs. It will likely take you a few days of morning and evening comb-out sessions to remove all the nits. You can use a lice comb with dense teeth, or use your fingernails. (I find the fingernail method works best.)
- Employ a system for nit removal and stick to it. Start in the same part of the head every time, and work your way back to this point. We start with the base of the neck, and work our way up and around. The area around and below the ears tends to be a favorite nesting zone.
- Nits can look like dandruff. The difference is dandruff will easily comb out, while nits will feel like they are attached to the hair shaft and will need to be pulled off.
- Set up the nit removal process near a source of water and make sure you have good light. We bring a chair into the bathroom. Wash your hands often, and have something disposable to catch the nits. We often put them into the basin of the sink, then carefully wipe the sink clean.
- Even when you are certain you have picked your last nit, keep checking for at least two days, then check again a few days later.
- On the bright side, we found that once we settled into the nitpicking routine, we used the time together -- away from homework and electronics -- to have some good family chats.


